

” or “Access denied”")


 Learning Guide")


 in SharePoint Online Modern Pages")


This post is the second part of a two part step by step tutorial on how to install SharePoint 2019 in a fully automated way using PowerShell.
To read the first part, click here.
Introduction
The SharePoint world is rapidly moving into the Cloud with SharePoint Online and Office 365, but a new SharePoint Server release was recently announced by Microsoft with improved hybrid support. To learn more about all the new features in SharePoint 2019, click here.
Before installing a SharePoint 2019 farm, it is important to be familiar with its requirements. To learn more about SharePoint 2019 hardware and software requirements, click here.
Installing a SharePoint farm can be a complex task and the installation process is composed by a series of steps:
- Downloading and installing SharePoint prerequisites
- Downloading and installing the SharePoint binaries
- Downloading and installing the lastest SharePoint updates
- Downloading and installing the required language packs (optional, necessary if you want the SharePoint interface to be presented in a language other than English)
- Configuring the SharePoint farm using SharePoint Products and Configuration Wizard
All the above steps are time consuming and can be error prone if, for example, you miss to download any of the prerequisites.
Fortunately, it is possible to fully automate a SharePoint farm installation using PowerShell by using a script called AutoSPInstaller. The installation process can be divided in two major steps:
- Downloading the SharePoint installation package, click here for more details
- Installing SharePoint and configuring the SharePoint farm
In this post, I will talk about the second part of the process: installing SharePoint and configuring the SharePoint farm.
AutoSPInstaller can be used to install a SharePoint farm in the following versions of SharePoint:
- SharePoint 2010
- SharePoint 2013
- SharePoint 2016
- SharePoint 2019 (to learn more about all the new features in SharePoint 2019, click here)
The example in this post is based on SharePoint 2019 with the following farm topology:
- 1 SharePoint 2019 Server
- 1 Database Server
Managed Accounts and Pre-Installation Requisites
This is a critical step to ensure a successful SharePoint installation. Before the AutoSPInstaller script is executed, all the necessary managed accounts must be created and the appropriate permissions must be properly granted to each account. If any of these permissions is not granted, you will probably encounter problems during the installation. From my experience doing SharePoint installations, creating these accounts with all the required permissions ensures a fast and successful SharePoint installation. Here is the list of accounts and required permissions before installation:
| Name | Description | Local Rights | Domain Rights |
| sp_farm | The server farm account is used to perform the following tasks: -Configure and manage the server farm. -Act as the application pool identity for the SharePoint Central Administration Web site. -Run the Microsoft SharePoint Foundation Workflow Timer Service. | SecurityAdmin and DB_Creator rights on the SQL Instance | Domain User |
| sp_admin | The server farm account is used to perform the following tasks: -Setup -SharePoint Products Configuration Wizard | Local Administrator on all the SharePoint Servers. SysAdmin, SecurityAdmin and DB_Creator rights on the SQL Instance. Must be na account with permissions to add rules to the local firewall. | Domain User |
| sp_pool | The Pool account is used to run the Web Application Pools | None | Domain User |
| sp_services | The Services Account is used to run the Service Application Pool | None | Domain User |
| sp_crawl | The Default Content Access Account for the Search Service Application | None | Domain User |
| sp_search | Service Account to run the SharePoint Search “Windows Service” | Local Administrator and SysAdmin rights on the SQL instance | Domain User |
| sp_mysitepool | Used for the My Sites Web Application | None | Domain User |
| sp_userprofilesync | The User Profile Synchronization Account | None | Replicating Directory Changes permission on the domain. |
| wf_service | WorkFlow Manager Service Account | Local Administrator and SysAdmin rights on the SQL instance. | Domain User |
| sp_portalsuperuser | Object Cache Service Account. The goals of the object cache are to reduce the load on the computer on which SQL Server is running, and to improve request latency and throughput. These user account must be properly configured to ensure that the object cache works correctly. | None. SharePoint: Must be an account that has Full Control access to the Web application. | Domain User |
| sp_portalsuperreader | Object Cache Service Account. The goals of the object cache are to reduce the load on the computer on which SQL Server is running, and to improve request latency and throughput. These user account must be properly configured to ensure that the object cache works correctly. | None. SharePoint: Must be an account that has Full Read access to the Web application. | Domain User |
Important Notes:
- To avoid problems executing the AutoSPInstaller script, ensure that the passwords of the above accounts do not contain any special characters (ex: $,%,&,/. etc)
- The above table contains a proposal to name the accounts for the SharePoint installation. If you choose to use different names, ensure that the account names do not exceed 20 characters since NETBIOS names have a limit of 20 characters
- After installation, the permissions for the SharePoint installation will have to be verified again and will be different from the above table. SharePoint configuration, service application and content databases will be created and some of the managed accounts listed in the above table will have to have permissions on some of those databases. For more details, please click here.
Download AutoSPInstaller PowerShell script
To download the latest version of AutoSPInstaller, click here.
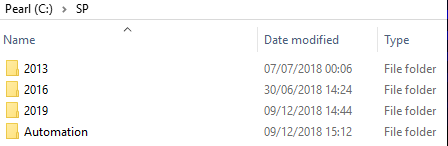
The files should be extracted to C:\SP\Automation, assuming that the SharePoint 2019 installation files downloaded with AutoSPSourceBuilder were saved to C:\SP\2019.
This is the folder structure that AutoSPInstaler uses:
\SP\Automation\AutoSPInstallerLaunch.bat
\SP\Automation\AutoSPInstallerInput.xml
\SP\Automation\AutoSPInstallerMain.ps1\SP\AutoSPInstallerMain.ps1
\SP\Automation\AutoSPInstallerModule.psm1
\SP\Automation\AutoSPInstallerConfigureRemoteTarget.ps1
\SP\201x\SharePoint\<installation files & folders>
\SP\201x\SharePoint\PreRequisiteInstallerFiles\
\SP\201x\SharePoint\Updates\
\SP\201x\LanguagePacks\xx-xx\
\SP\201x\LanguagePacks\xx-xx\Updates\
\SP\201x\Updates\
In this example, the root folder of the installation is C:\SP.
Creating the AutoSPInstaller configuration file
The next step, is to configure the AutoSPInstaller input configuration file that can be done in the AutoSPInstaller web site. The end result of the configurations set in the AutoSPInstaller web site is the download of an XML file (AutoSPInstallerInput.xml) that contains all the settings required to configure the SharePoint farm. The AutoSPInstallerInput.xml file contains among other configurations:
- SharePoint version to install
- The SharePoint product key
- The Farm Account and all Managed Accounts and their credentials
- The database instance that will support the SharePoint environment
- The web applications we want to create (ex: Intranet. My Site, etc)
- The service applications we want to enable and their configurations
- Outgoing email settings for the farm
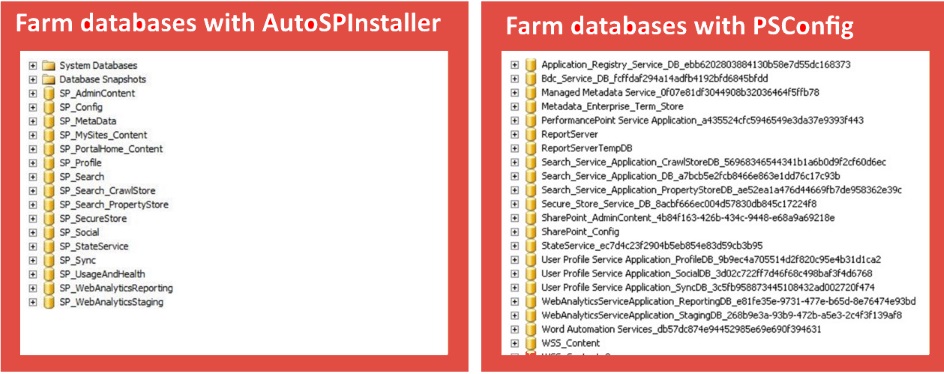
- Database names: this is extremely useful since it allows us to have complete control over the names of all the databases that will be created during the SharePoint farm configuration and avoid having databases with unclear names containing GUIDs which is the default behavior if we configure the farm using SharePoint Products Configuration Wizard (PSConfig)
The AutoSPInstallerInput.xml file should be placed in C:\SP\Automation.
Installing SharePoint
After the AutoSPInstallerInput.xml file is configured, it’s time to install SharePoint!
IMPORTANT: the following steps should be executed using the sp_admin account.
Follow the following steps:
1. Run AutoSPInstallerLaunch.bat from the command line (run as administrator).
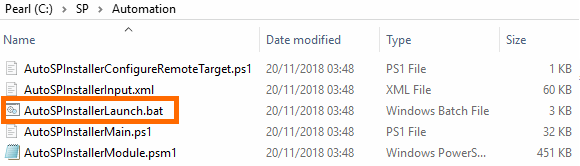
AutoSPInstallerLaunch.bat will launch a PowerShell window that will install SharePoint and configure the farm using as an input the AutoSPInstaller XML configuration file (AutoSPInstallerInput.xml) previously configured using the AutoSPInstaller web site.
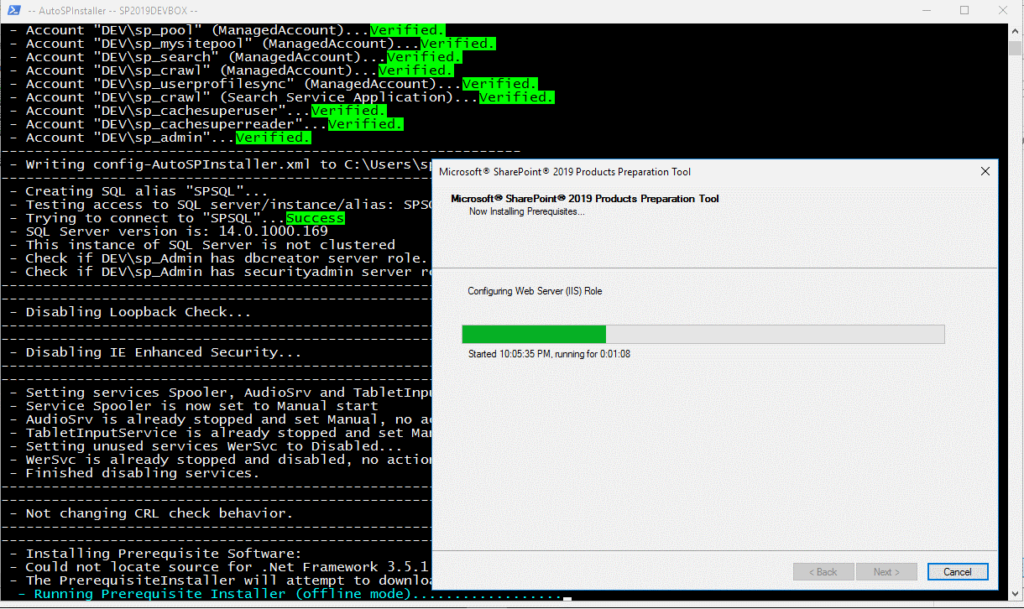
2. After the PowerShell window is launched, the following will happen:
- Managed accounts credentials will be validated. If any of the credentials is incorrect, the script will stop
- SharePoint prerequisites will be installed
- SharePoint will be installed
- SharePoint language packs will be installed
- SharePoint updates will be installed
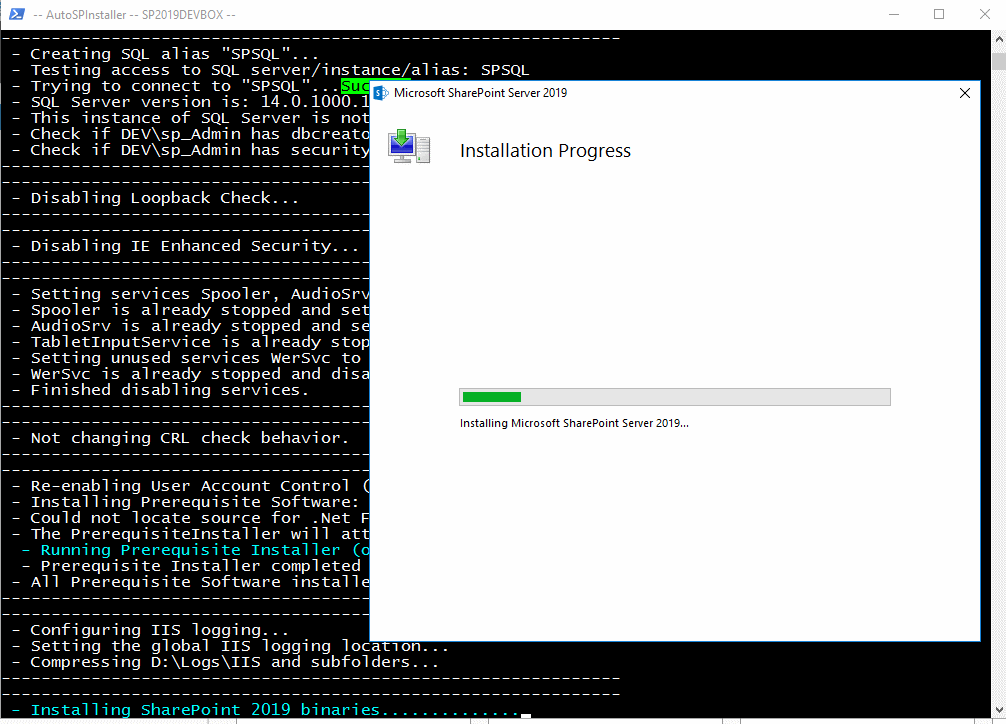
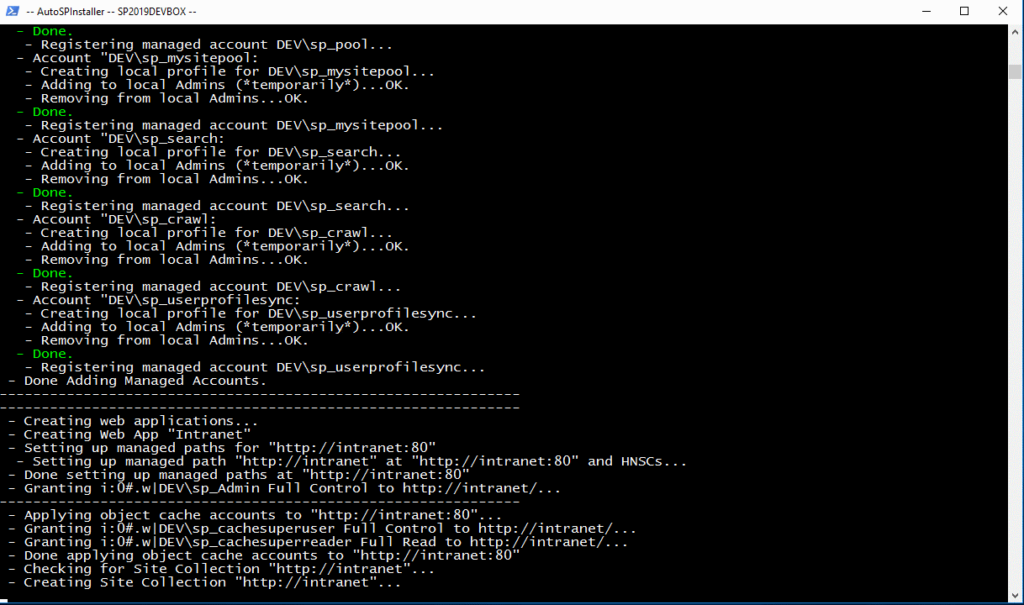
The PowerShell script will start by validating all managed managed accounts configuration and if everything is OK, the SharePoint installation is started, beginning with the installation of all required prerequisites.
After prerequisites are installed, the script will install SharePoint.
The SharePoint installation assumes that all prerequisites were successfully installed. If any of the prerequisites was not successfully installed, an error similar to the following may occur.
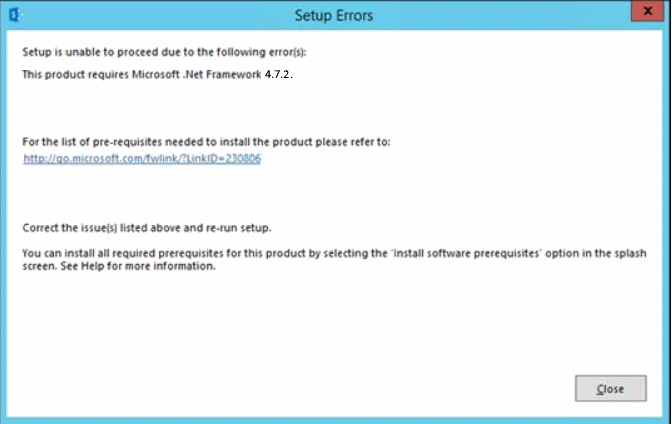
To solve this error, there are two valid approaches:
- Run AutoSPInstaller from the beginning so that the missing prerequisite(s) are installed
- If the error remains, install the missing prerequisite(s) manually
If no errors occur or after the prerequisites errors are solved, the PowerShell script will continue to do its magic until all SharePoint binaries are installed.
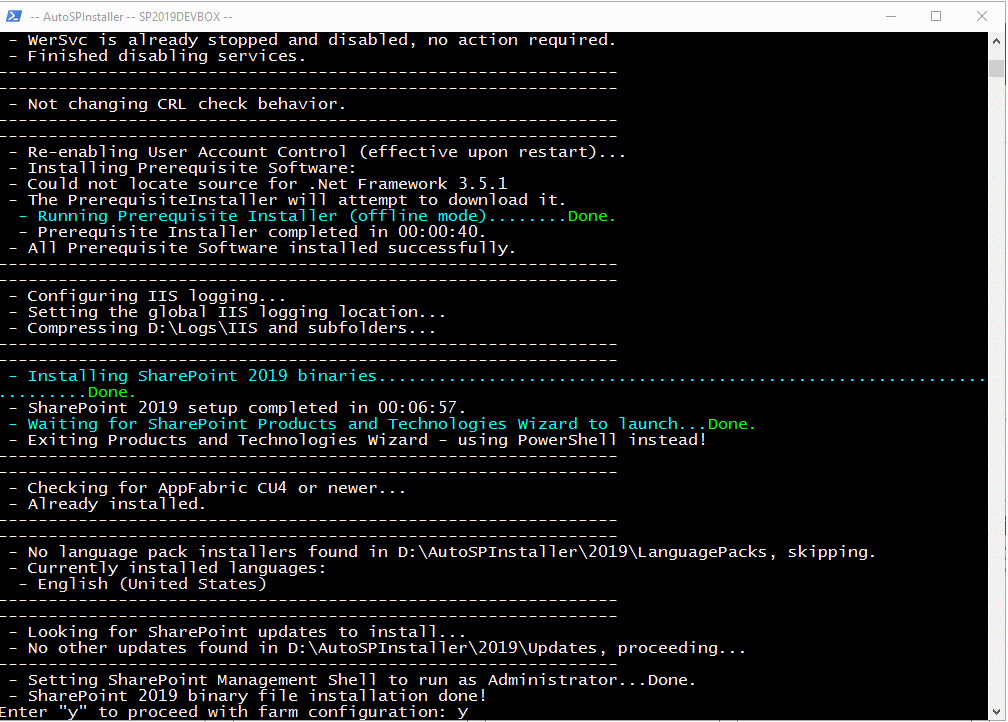
After SharePoint binaries are installed, it’s time to configure the farm!
Configuring the SharePoint Farm
After SharePoint is installed, the script will ask if we want to proceed with farm configuration. To proceed, select “y” and click ENTER. The script will, among others, perform the following actions:
- Create all managed accounts
- Configure IIS and SharePoint ULS log file paths
- Create the configured web applications (ex: Intranet, My Site)
- Configure the service applications
- Configure outgoing email settings for the farm
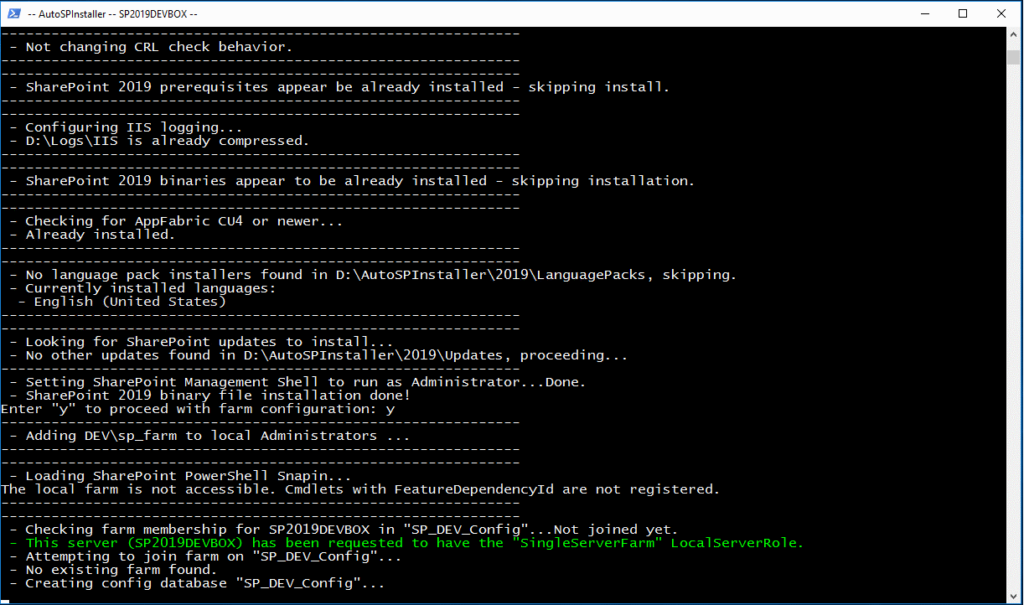
The PowerShell script will continue until the SharePoint farm is configured.
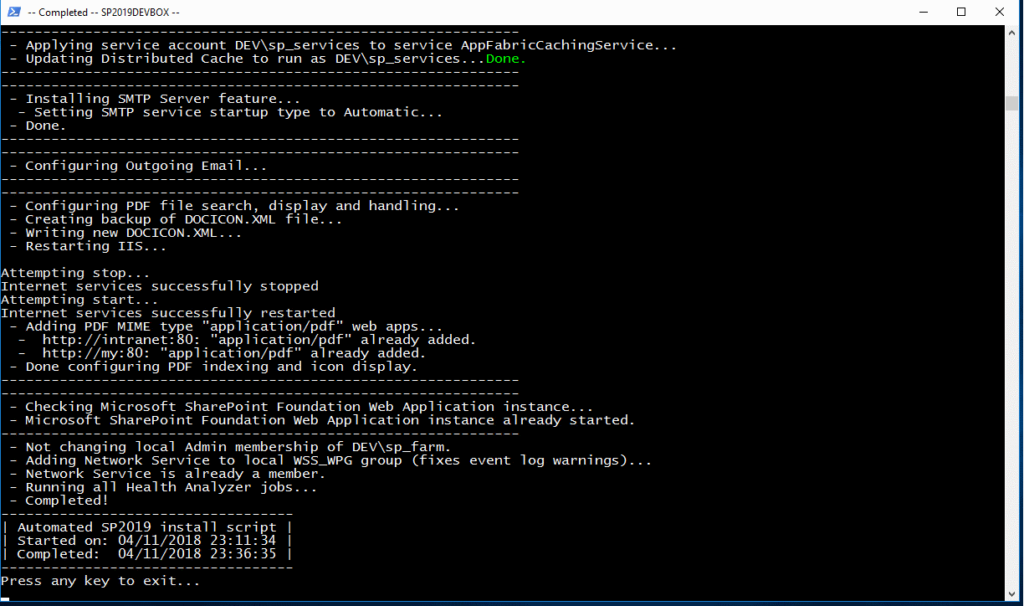
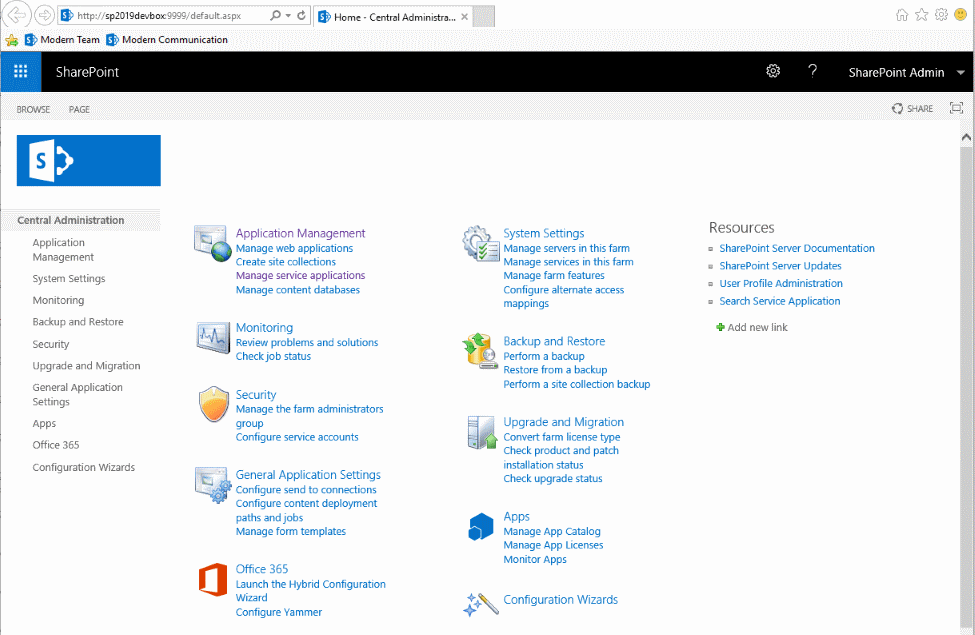
After the farm configuration is completed, the Central Administration will be opened and SharePoint is installed!
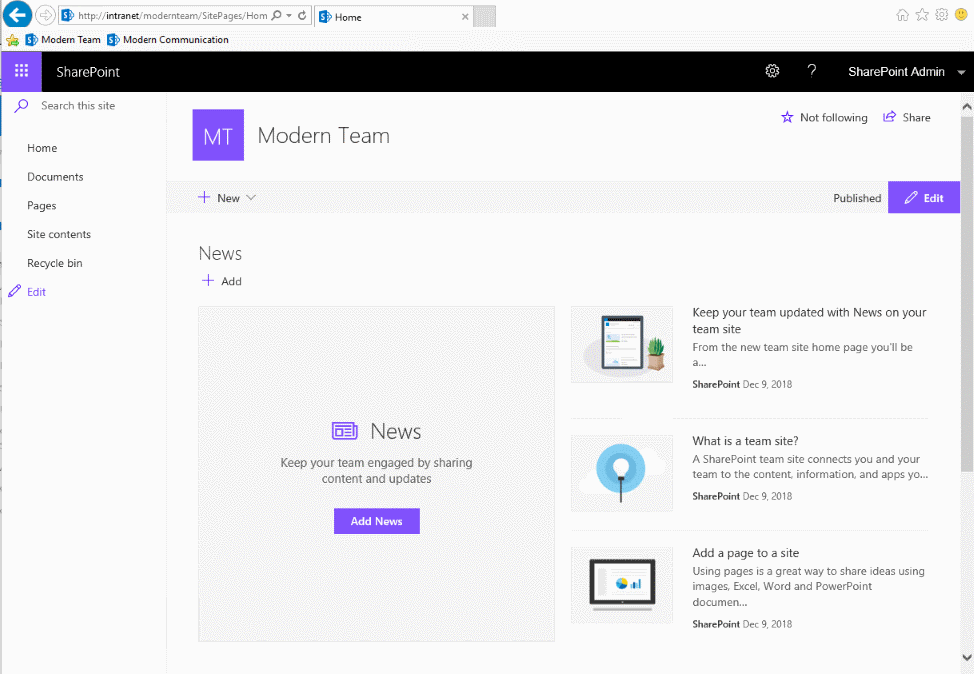
If you configured a web application to be created, the image below shows how a modern Team Site will look like in your SharePoint 2019 environment.
IMPORTANT NOTE: It is recommended that you don’t delete the Default Web Site. If you do, the “SharePoint Web Services” IIS site created during the SharePoint installation will be created with ID 1 and the SharePoint configuration will stop this site because it is trying to stop the Default Web Site that has ID 1. If you delete the Default Web Site, make sure you change the “SharePoint Web Services” web site ID to a unique value different from 1.
Multi-Server Installation (SharePoint servers)
If you want to install SharePoint 2019 in multiple servers there is a number of considerations that you have to take into account. Some of the most important decisions are:
- What is your farm topology and the number of servers you want to consider (WFEs, Application Servers and Database Servers)
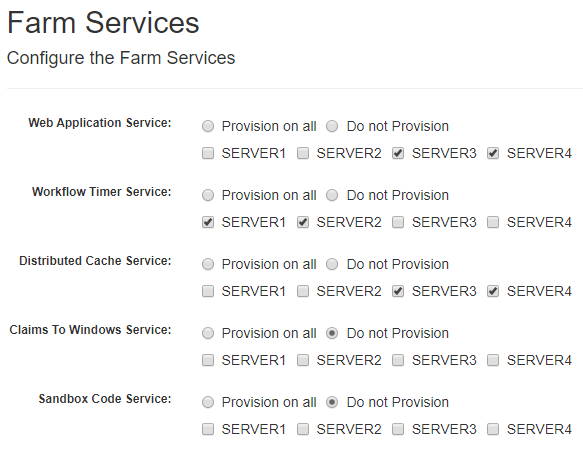
- Which services and service applications will be provisioned for each server
- Will you be using MinRoles or will you use a custom installation where you will be manually selecting the services and service applications that will be provisioned for each server?
If you use MinRoles, these will supersede the individual service and service application selection for each server in the farm. These are the available MinRoles:
- Front-end
- Application
- Distributed cache
- Search
- Custom (allows for a more granular selection of what services are provisioned in each server)
- Single-server farm (the only configuration where SQL Server may be installed in the same server as SharePoint 2019, configuration not detailed here, reference the <Database> section in the AutoSPInstallerInput.xml file at the AutoSPInstaller web site)
- Front-end with Distributed Cache (merge of Front-end and Distributed cache MinRoles)
- Application with Search (merge of Application and Search MinRoles)
Each of the MinRoles automatically provisions a specific set of services and service applications. If you want to learn more about MinRoles, click here.
Once farm topology and service/service application distribution is decided, we are ready to install SharePoint 2019 in multiple servers. For the installation process, you basically have two options:
- Use Remote Installation
- Install SharePoint individually in each SharePoint server
AutoSPInstaller Input File Configuration for Multi-Server Installation Notes when not using MinRoles
If you decide not to use MinRoles and go for a Custom installation (which allows for a more granular selection of what services are provisioned in each server), you must ensure that the AutoSPInstaller XML input file in all servers is configured as Custom.
When configuring AutoSPInstaller in the AutoSPInstaller web site not to to use MinRoles, you will typically have a configuration similar to the one below.
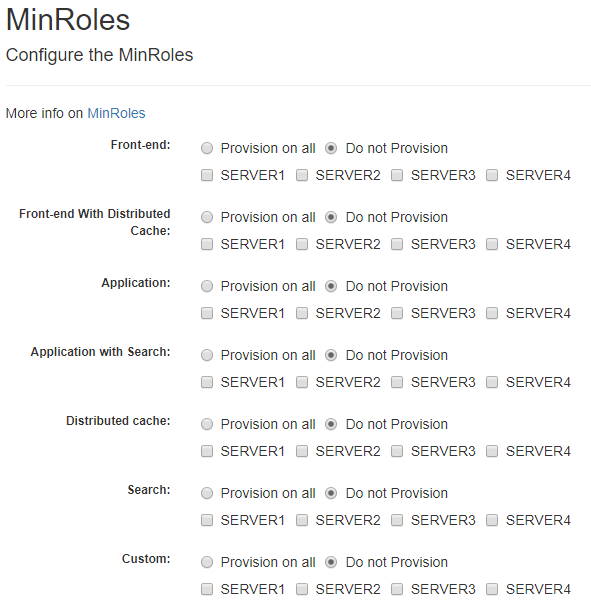
This seems correct but the generated XML configuration will have the following configuration in the <ServerRoles> section:
- <Custom Provision=” false” />
- <SingleServerFarm Provision=”localhost ” />
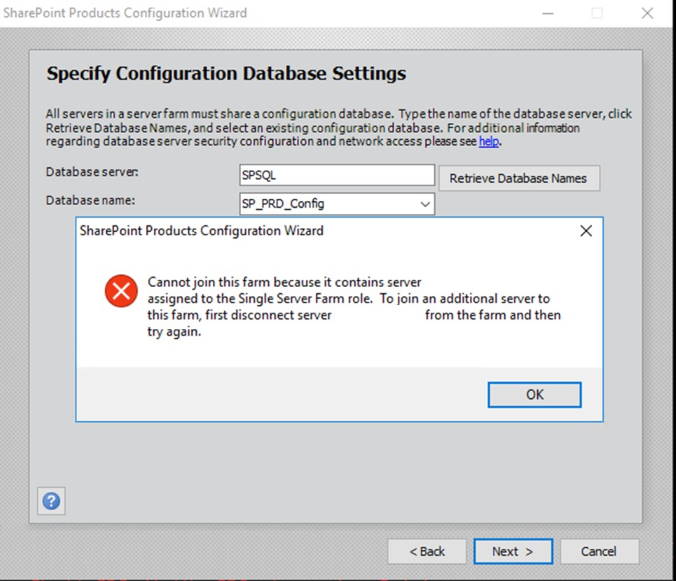
With the configuration above, each server will be installed with a single server role and you will only be able to join the first server to the farm. When you try to add the remaining servers, the AutoSPInstaller PowerShell script instead of adding the servers to the farm, will try to recreate the farm, which will result in the error below.

If you try to add the server manually to the farm, you will get the error below.
To solve this, you must edit the XML configuration to configure the servers as “Custom” and not “SingleServerFarm”, using a configuration similar to the following example (specific configuration depends on the number of servers and roles for each server):
- <Custom Provision=”localhost” />
- <SingleServerFarm Provision=”false” />
<ServerRoles>
    <Custom Provision="localhost" />
    <WebFrontEnd Provision="false" />
    <WebFrontEndWithDistributedCache Provision="false" />
    <SingleServerFarm Provision="false" />
    <Search Provision="false" />
    <Application Provision="false" />
    <ApplicationWithSearch Provision="false" />
    <DistributedCache Provision="false" />
</ServerRoles>
Remote Installation
In this approach, SharePoint will be installed using AutoSPInstaller on all servers from one of the SharePoint servers. The script will first install SharePoint locally on the server where the script is being executed and will then install SharePoint remotely on the other servers (all at once or one by one depending on AutoSPInstaller configuration file). The installation on the remote servers is performed using PowerShell Remoting and Windows Remote Management (WinRM). WinRM must be enabled for each of the servers where SharePoint will be installed remotely. To learn more about Remote Install (example for SharePoint 2013 but valid for SharePoint 2019 in what regards to remote installation), click here.
Install SharePoint individually in each SharePoint server
This option doesn’t require WinRM to be enabled on any of the servers but requires instead that the AutoSPInstaller installation folder (C:\SP in this post) is copied to all servers. Additionally, there are some important notes to consider:
- SharePoint bits must be installed on all servers but farm configuration must only be done once all servers have the SharePoint bits installed. You may Install the SharePoint bits (all steps before the “Configuring the SharePoint Farm” in this post) in all servers at the same time but you must stop the installation process once you are asked to continue with farm configuration
- After the SharePoint bits are installed on all servers, you may proceed to the “Configuring the SharePoint Farm” section of this post BUT this must be done server by server, one at a time, sequentially. The AutoSPInstaller configuration file will determine what services and service applications are going to be provisioned on each server:
- When you run the farm configuration in the first server, the farm will be created and the services and service applications that are configured to run on that server will be provisioned
- When you run the farm configuration on the other servers, each server will be added to the farm and the services and service applications that are configured to run on that server will be provisioned
To read the first part of this two part step by step tutorial, click here.
Related Articles
To learn why your business should migrate to SharePoint Online and Office 365, click here and here.
If you want to convert your tenant’s root classic site into a modern SharePoint site, click here.
If you are new to SharePoint and Office 365 and want to learn all about it, take a look at these learning resources.
If you are work in a large organization who is using Office 365 or thinking to move to Office 365 and is considering between a single or multiple Office 365 tenants, I invite you to read this article.
To learn more about all the new features in SharePoint 2019, click here.
If you want to learn how to upgrade a SharePoint 2013 farm to SharePoint 2019, click here and here.
If you want to learn all the steps and precautions necessary to successfully keep your SharePoint farm updated and be ready to start your move to the cloud, click here.
If you learn how to greatly speed up your SharePoint farm update process to ensure your SharePoint farm keeps updated and you stay one step closer to start your move to the cloud, click here.
If you want to know all about the latest SharePoint and Office 365 announcements from SharePoint Conference 2019, click here and here.
If SharePoint 2019 is still not an option, you can learn more about how to install a SharePoint 2016 farm in an automated way using PowerShell, click here and here.
If you are involved in a SharePoint upgrade and want to learn more about the upgrade process, click here and here.
Happy SharePointing!


HI ,
I have installed sp2019 and facing challenge connecting to web app in a dns setup. It works locally while making host entries. Can you please help. I am using hostheader web app and created dns A record to F5 with web server ips pointing to 443 port
Hello Mohit.
Unfortunetly, I am not a DNS expert. Take a look at https://sharepoint.fpweb.net/sharepoint-blog/how-to-configure-dns-and-ssl-for-sharepoint-2013-apps/, hope it helps.
Thanks,
Miguel