

” or “Access denied”")


 Learning Guide")


 in SharePoint Online Modern Pages")


WLED is a really cool project found here. It’s a web server to run on ESP8266/ESP32 that can control a lot of different kind of leds.
In the next paragraphs I will show you how did I build my first TV led strip. I will show you the parts that I’ve used, how to install the software, and also the way I’ve assembled everything in a small box on the back of my TV.
The first thing that I did was to buy an ESP8266. I bought this one from Mauser.
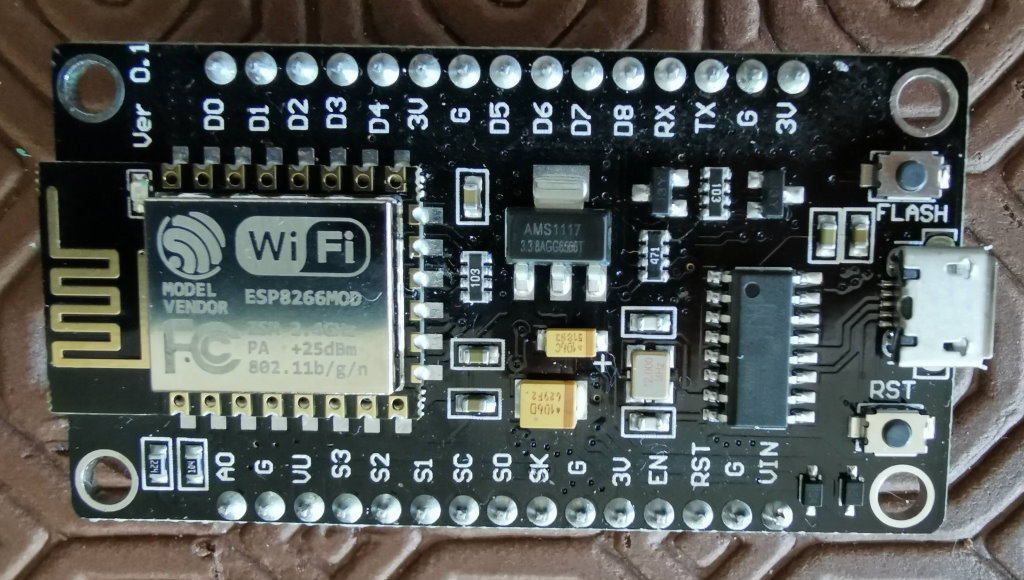
I’ve connected the ESP8266 to my PC with the USB cable. And uploaded to the device. How did I do that?
The WLED binary that I’ve used was WLED_0.10.2_ESP8266.bin that I’ve downloaded from the releases page.
I use this great tool esphome-flasher. Downloaded the latest release here. Just run the tool and choose the previous downloaded binary. Don’t forget to have the device connected to the USB port of your computer.
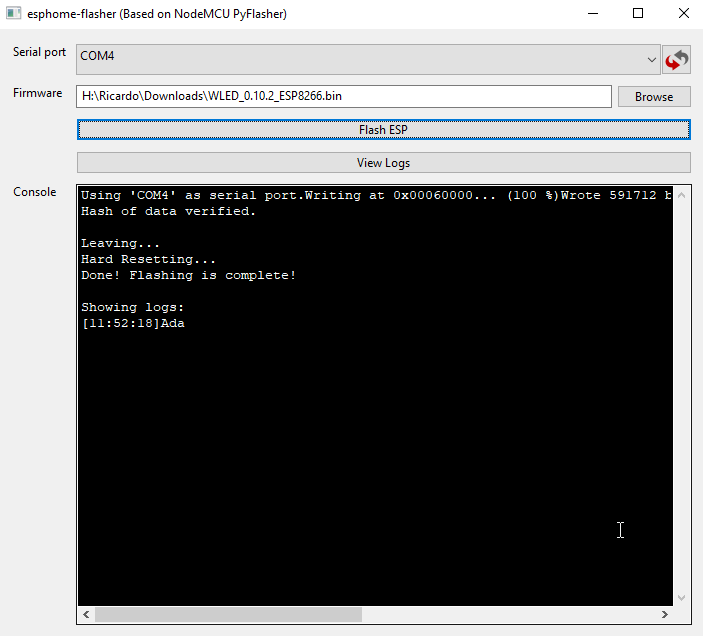
In my computer the device shows up in COM4 port.
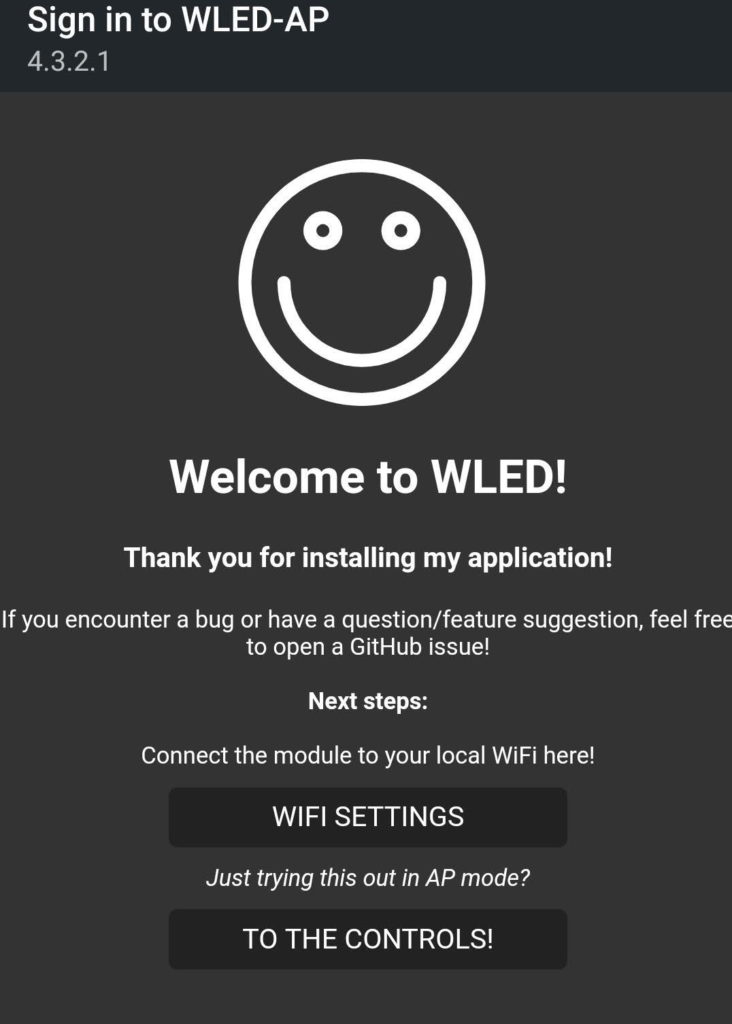
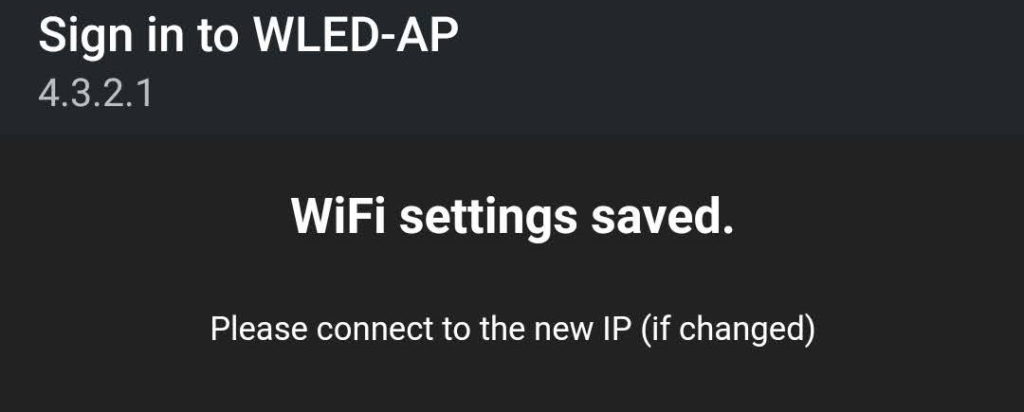
After that your newly flashed WLED device should give you an access point named WLED-AP. Connect to it with wled1234 password. I connected with my phone and I was immediately redirected to the first time configuration web page. If this doesn’t happen to you, open the browser and go to 4.3.2.1 you should see this page.
Insert your home wifi SSID and password, click Save & Connect.
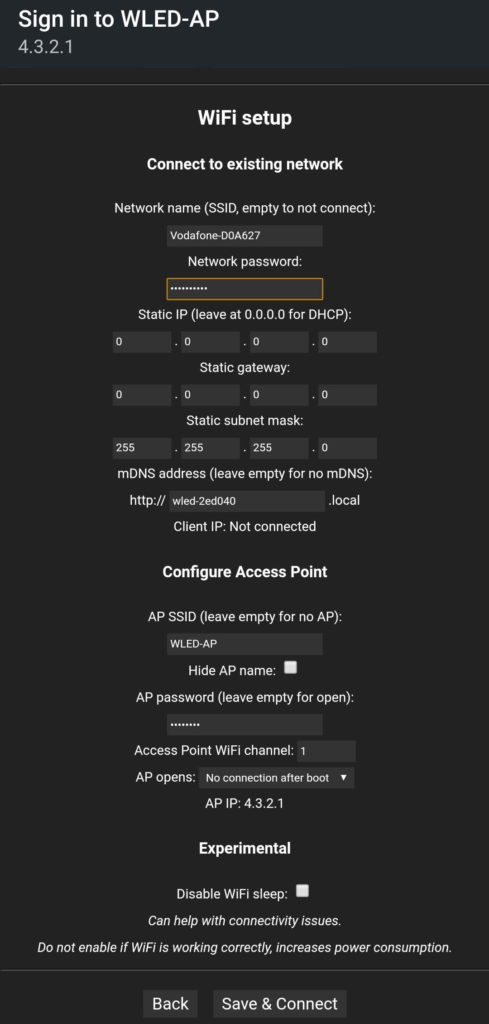
Your device will reboot and connect to your wifi network.
Find the IP address of your device using one of the thousands of network tools available on the internet and open your browser with that IP address.
And that’s it. You have your WLED device installed and ready to use.
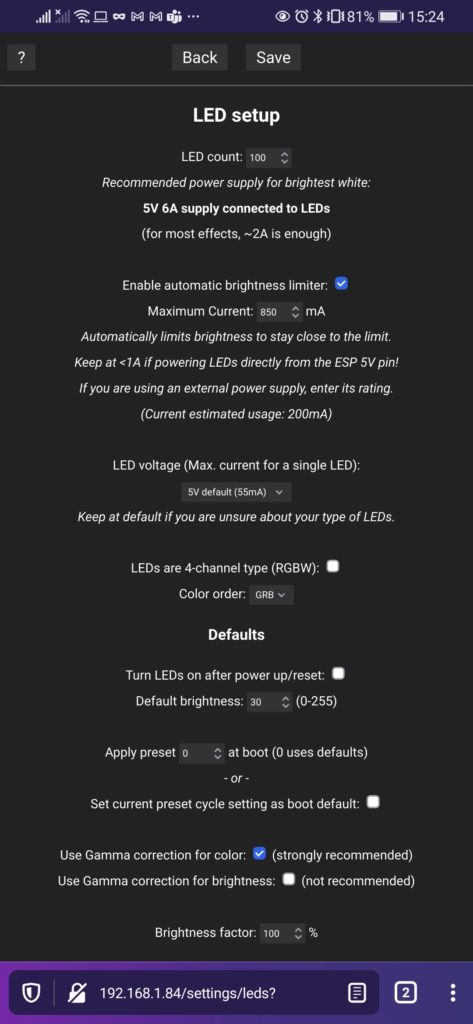
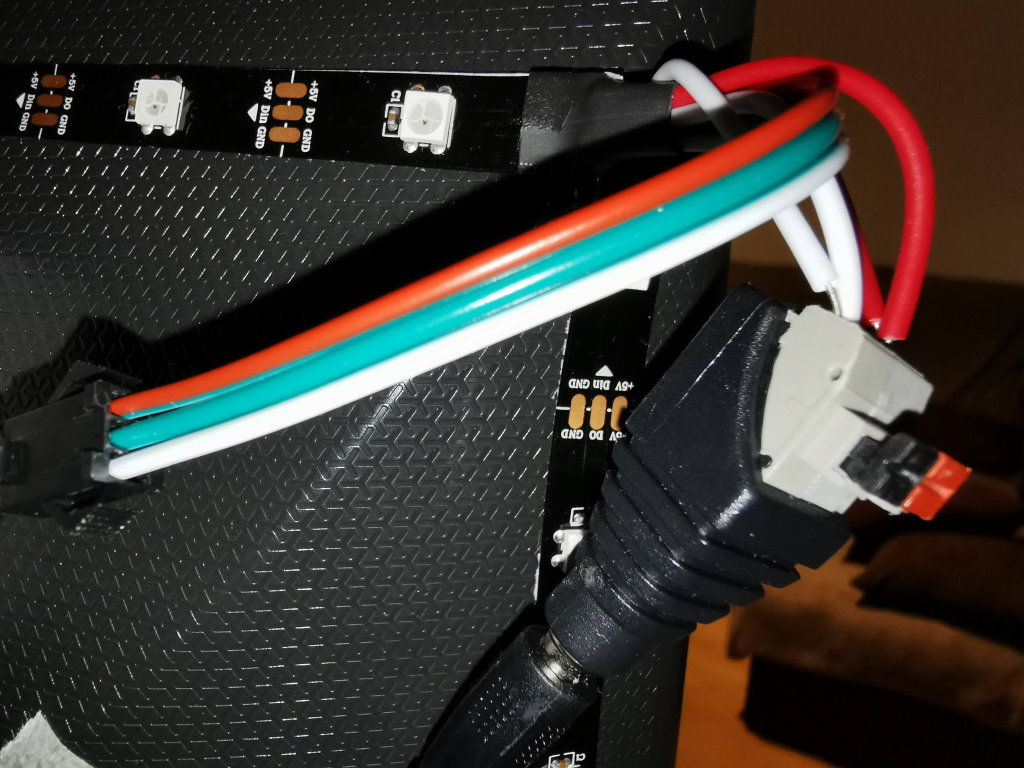
For the LED strip I bought from AliExpress. It’s a 5 meter WS2810 LED strip (individually addressable leds). The next configuration is the LED count. For that, I needed to measure my TV, cut the strip and count the number of LEDs that I was going to control. For my TV I have 18 leds on each side and 32 leds, top and bottom. That gives me a total led count of 100.
Now for the wire connection, this is how you should do it. Im using a 5V led strip so I followed the first option in the schematics picture below.
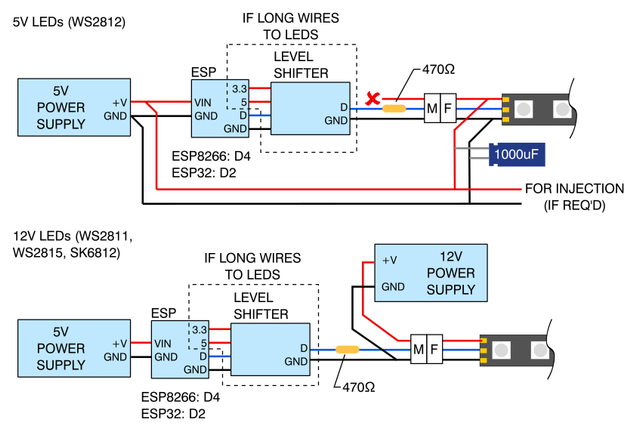
I took this picture from projectwiki – https://github.com/Aircoookie/WLED/wiki
If the distance between the device and the led strip is long you should use a level shifter. That was not my case so I didnt have the need to include one in my solution. I used the 470 ohm resistor and and the 1000 uF capacitor.
Because I used the nodemcu, it is an ESP8266 device, I connected the D4 pin to the data input on the led strip. The led strip has3 conductors, 5V, GND and DATA.
I connected the 5V and GND not only in the beginning of the led strip but also in the end. The data input, that is connected to D4 pin, it is only connected in the beginning of the strip, and there is an arrow on the strip pointing to the data signal flow direction.
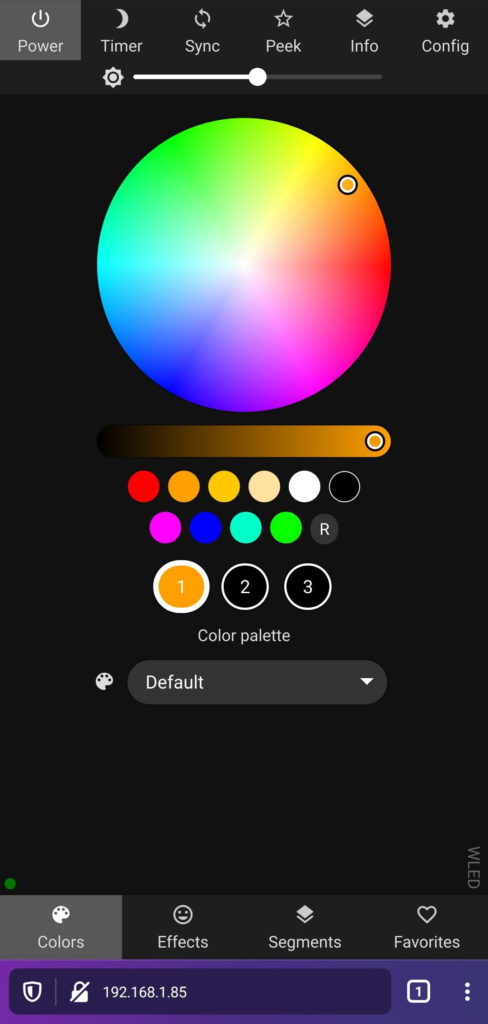
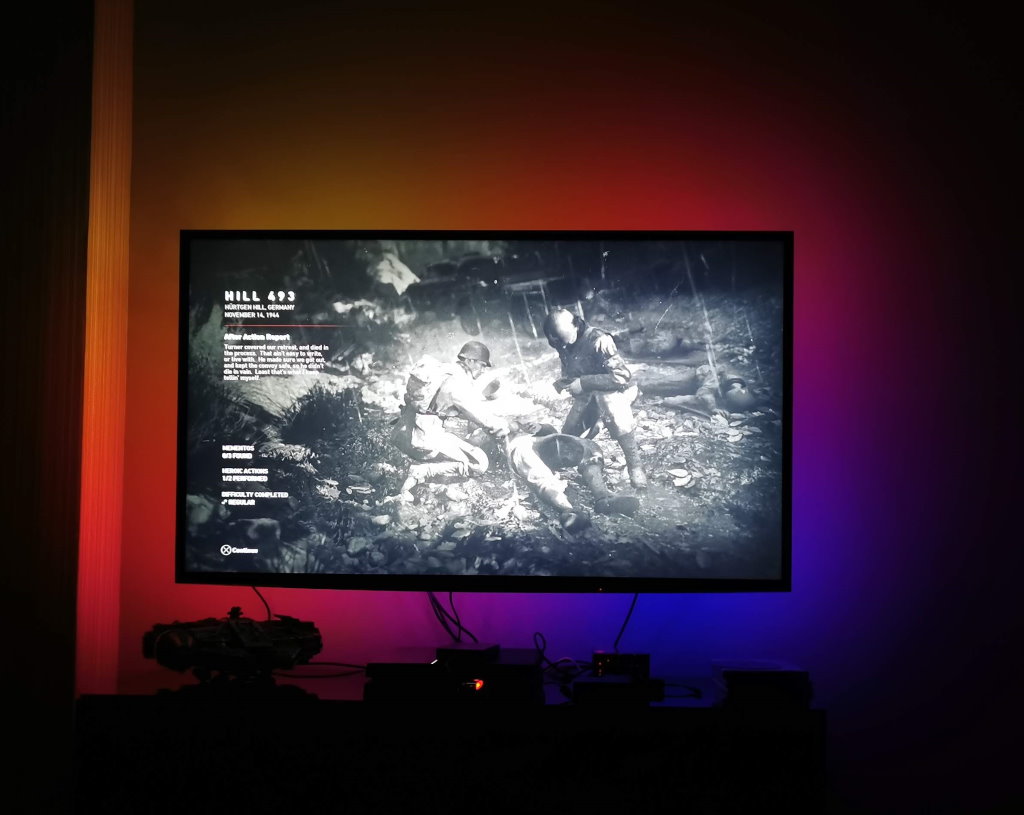
And that’s it! I can know control my TV led strip thru the web interface and I can also use the WLED mobile that I’ve installed on my smartphone.
Enjoy!


Looks great! Can’t the colors be dynamically aligned with the tv screen? Something like this: https://youtu.be/e9sswAYv2tA.
I think that what you want is not what is on that video. That video is not a solution for the leds to be in sync with the image on the TV. It’s similar to what I have with WLED. WLED it’s just a controller for the led strip and has a lot of features like dynamic effects that you can see on that video.
For the leds to be in sync with the image check the Hyperion Project. I’m planning to do that in the next weeks. The hyperion will capture the image, and will control the WLED to match the color images. It’s the next step for this project.
Nice! Make sure it works ok so that you can set ip up at my place afterwards!