

” or “Access denied”")


 Learning Guide")


 in SharePoint Online Modern Pages")


This post explains how you can create a dynamic team in Microsoft Teams to have all active employees in your company using Azure AD Group dynamic membership rules.
Introduction
We are living challenging times with the current Covid-19 pandemic crisis and keeping teams together is more important than ever!
Org-wide teams have been around for quite some time, but these are quite inefficient since we don’t have any control on what users are added to the team (service accounts for instance are also added if they have valid licenses assigned to them).
This post explains how you can create a new team in Microsoft Teams containing all active employees in your company based on Azure AD Group dynamic membership rules. Unlike org-wide teams, this approach gives you complete control over what users are added to the team.
The “Team with all employees” scenario makes more sense for small and medium-sized companies. For larger companies, the steps provided in this post can be adapted to create smaller dynamic teams based on Azure AD dynamic membership rules (ex: department teams or any other type of dynamic teams based on valid Azure AD user profile properties).
Pre-Requisites and How-To Steps
Pre-Requisites
The steps described in this post require:
- Azure AD Premium P1 license for all users included in the dynamic team
- If you are using Active Directory, AD attributes have to be correctly configured and synced to Azure AD to allow the dynamic group to retrieve all active company employees (in our example, we are using the companyName attribute and all users with companyName = “Create IT” will be considered as active employees)
How-To Steps
Now it is time for the fun part! Follow the following steps:
- Create a new Team in Microsoft Teams as you would to create a “normal” team. If the team already exists and you want to change an already existing Team to be dynamic, you can skip this step
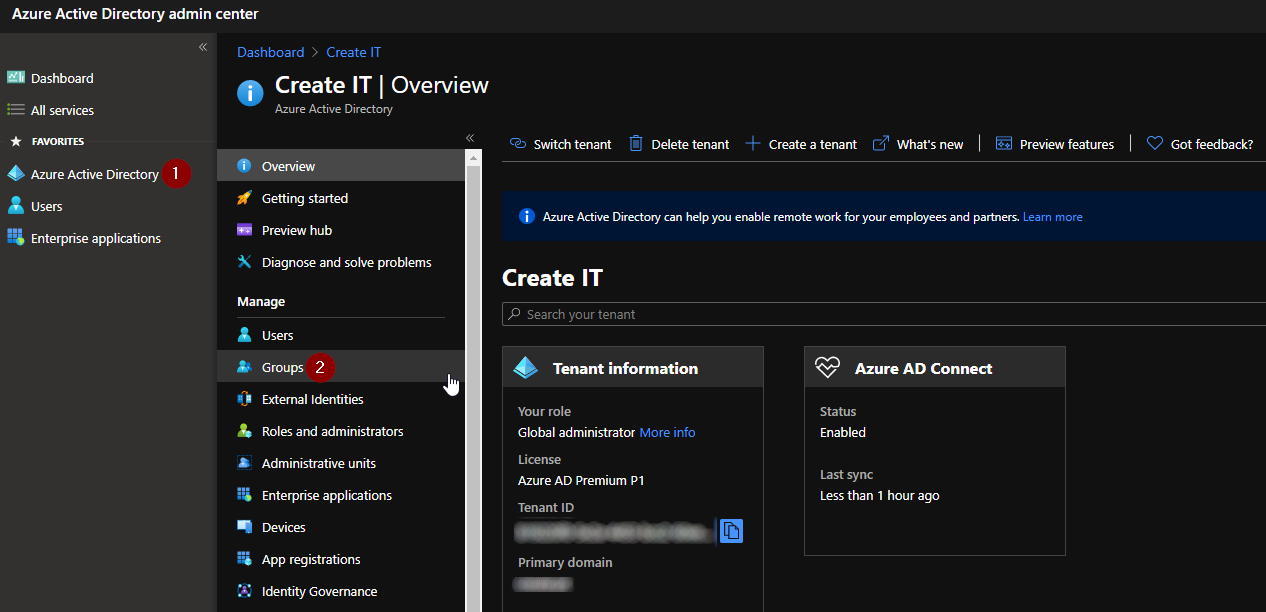
- Go to your Azure Active Directory Admin Center
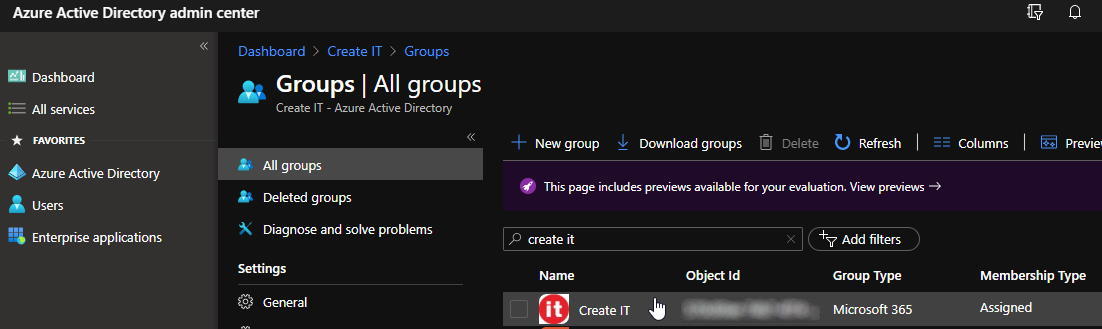
- In Azure Active Directory Admin Center, select “Groups”. This option will allow us to access all Azure AD Groups, that contain teams in Microsoft Teams (group type = “Microsoft 365”)

- Select the group you want to edit and set as dynamic. Membership type should be at this time set as “Assigned”, meaning that all members are added manually.
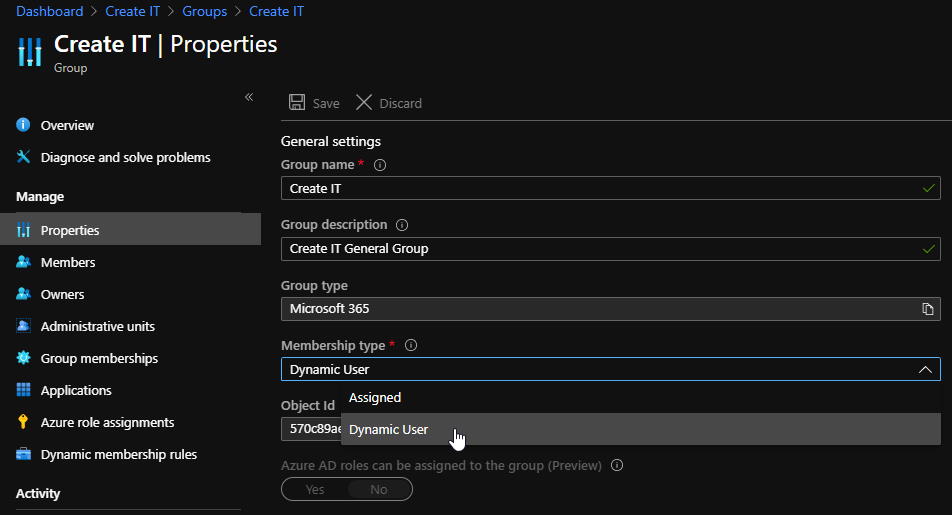
- The group details are now shown
- Select “Properties” on the left menu and change the membership type to “Dynamic user” and click “Save”
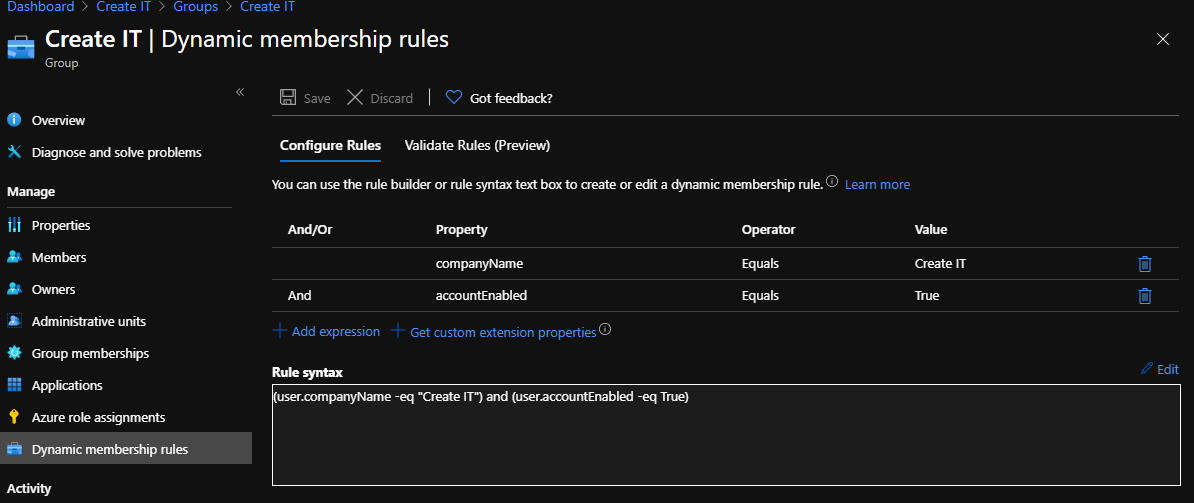
- Select “Dynamic membership rules” on the left menu and add an expression that dynamically retrieves the active employees in the company. In our case, the expression is “(user.companyName -eq “Create IT”) and (user.accountEnabled -eq True)”. Click “Save” to save your changes.
- The Azure AD Group is now dynamic and users in the group will be retrieved using the expression set in the previous step
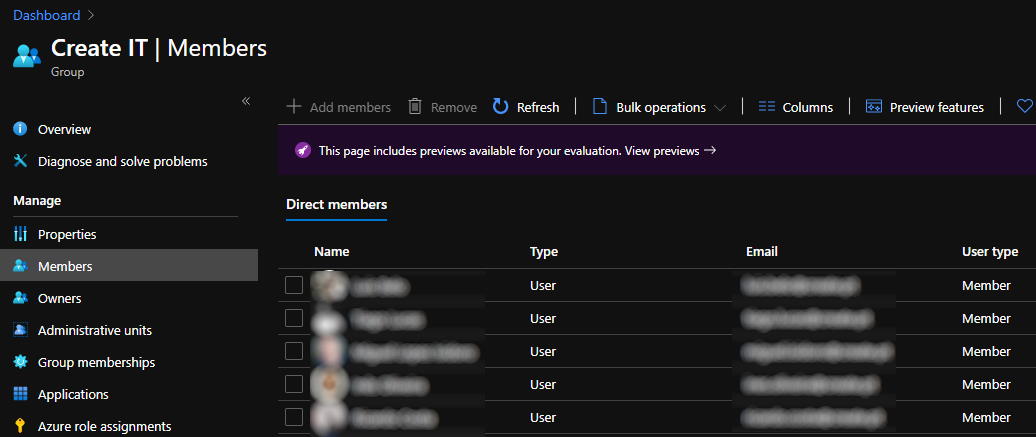
- Select “Members” in the left menu. Now that the AD Group is dynamic, you will not be able to add or remove members from the group manually.


Testing The Results
To test if the configuration was successful, just follow the following steps:
- Add a new user to Active Active Directory, filling the attributes that match the dynamic membership group expression in the Azure AD Group
- Force Azure Active Directory to Azure AD synchronization
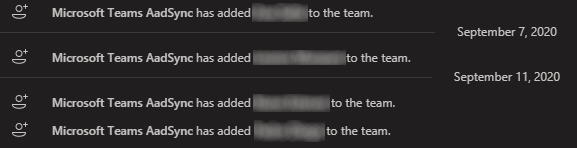
Everytime new employees are added to Active Directory and synced to Azure AD, a message in the “General” channel in Microsoft Teams will be shown saying that the user has been added to team!
Related Articles
To learn why your business should migrate to SharePoint Online and Office 365, click here and here.
If you want to learn how you can rename a modern SharePoint site, click here.
If you want to learn how to save time time scheduling your meetings, click here.
If you want to learn how to enable Microsoft Teams Attendance List Download, click here.
If you want to modernize your SharePoint classic root site to a modern SharePoint site, click here.
If you are a SharePoint administrator or a SharePoint developer who wants to learn more about how to install a SharePoint 2019 farm in an automated way using PowerShell, I invite you to click here and here.
If you learn how to greatly speed up your SharePoint farm update process to ensure your SharePoint farm keeps updated and you stay one step closer to start your move to the cloud, click here.
If you prefer to use the traditional method to update your farm and want to learn all the steps and precautions necessary to successfully keep your SharePoint farm updated, click here.
If you want to learn how to upgrade a SharePoint 2013 farm to SharePoint 2019, click here and here.
If SharePoint 2019 is still not an option, you can learn more about how to install a SharePoint 2016 farm in an automated way using PowerShell, click here and here.
If you want to learn how to upgrade a SharePoint 2010 farm to SharePoint 2016, click here and here.
If you are new to SharePoint and Office 365 and want to learn all about it, take a look at these learning resources.
If you are work in a large organization who is using Office 365 or thinking to move to Office 365 and is considering between a single or multiple Office 365 tenants, I invite you to read this article.
If you want to know all about the latest SharePoint and Office 365 announcements from Ignite and some more recent announcements, including Microsoft Search, What’s New to Build a Modern Intranet with SharePoint in Office 365, Deeper Integration between Microsoft Teams and SharePoint and the latest news on SharePoint development, click here.
If your organization is still not ready to go all in to SharePoint Online and Office 365, a hybrid scenario may be the best choice. SharePoint 2019 RTM was recently announced and if you to learn all about SharePoint 2019 and all its features, click here.
Happy Scheduling!


very useful presentation, it helped me
Thanks a lot for your feedback. Glad it helped!